Transforming Sourdough Discard into Everyday Perfection: Your Guide to Simple Toasting Bread
For those immersed in the world of sourdough baking, the rhythm of feeding your starter is a familiar one. And with that rhythm often comes a delightful, yet sometimes daunting, byproduct: sourdough discard. Instead of relegating it to the compost bin or endless batches of pancakes, imagine transforming that excess into another loaf of bread – a soft, sturdy, and utterly versatile loaf perfect for your morning toast or a hearty sandwich. This article will guide you through making the ultimate simple sourdough discard toasting bread, a recipe designed for ease, flavor, and maximum utility.
Many bakers look for creative ways to use their discard, from crackers to muffins. But for families who subsist on the simple pleasures of toast and sandwiches, using discard to create a fundamental, everyday loaf is a true revelation. This particular recipe stands out for its straightforward approach, minimal ingredients, and fantastic results, proving that delicious, homemade bread doesn't always require hours of active kneading or complex techniques.
Why Your Sourdough Discard Deserves a Second Life (Beyond Pancakes!)
Sourdough discard isn't just a leftover; it's a flavorful ingredient waiting for its next starring role. While it lacks the leavening power of an active starter, it still brings a subtle depth and tang to baked goods, enhancing their flavor profile in a way that commercial yeast alone cannot. Here’s why using it in bread, particularly a simple toasting loaf, is such a brilliant idea:
- Reduced Waste: It's the most satisfying way to use up excess starter, aligning perfectly with a sustainable kitchen philosophy.
- Enhanced Flavor: The discard introduces a mild, characteristic sourdough tang that elevates the bread’s taste without the lengthy fermentation required for a traditional sourdough loaf.
- Improved Texture: The acidity in the discard can contribute to a more tender crumb, even in recipes primarily leavened with instant yeast.
- Beginner-Friendly: Unlike complex sourdough recipes that demand precise timing and advanced skills, discard recipes often simplify the process, making them accessible to new bakers and those short on time. For a super hands-off approach, you might even consider methods like No-Fuss Sourdough Discard Bread: Quick & Delicious for Busy Bakers, often made in a bread machine.
What Makes This Simple Sourdough Discard Toasting Bread Stand Out?
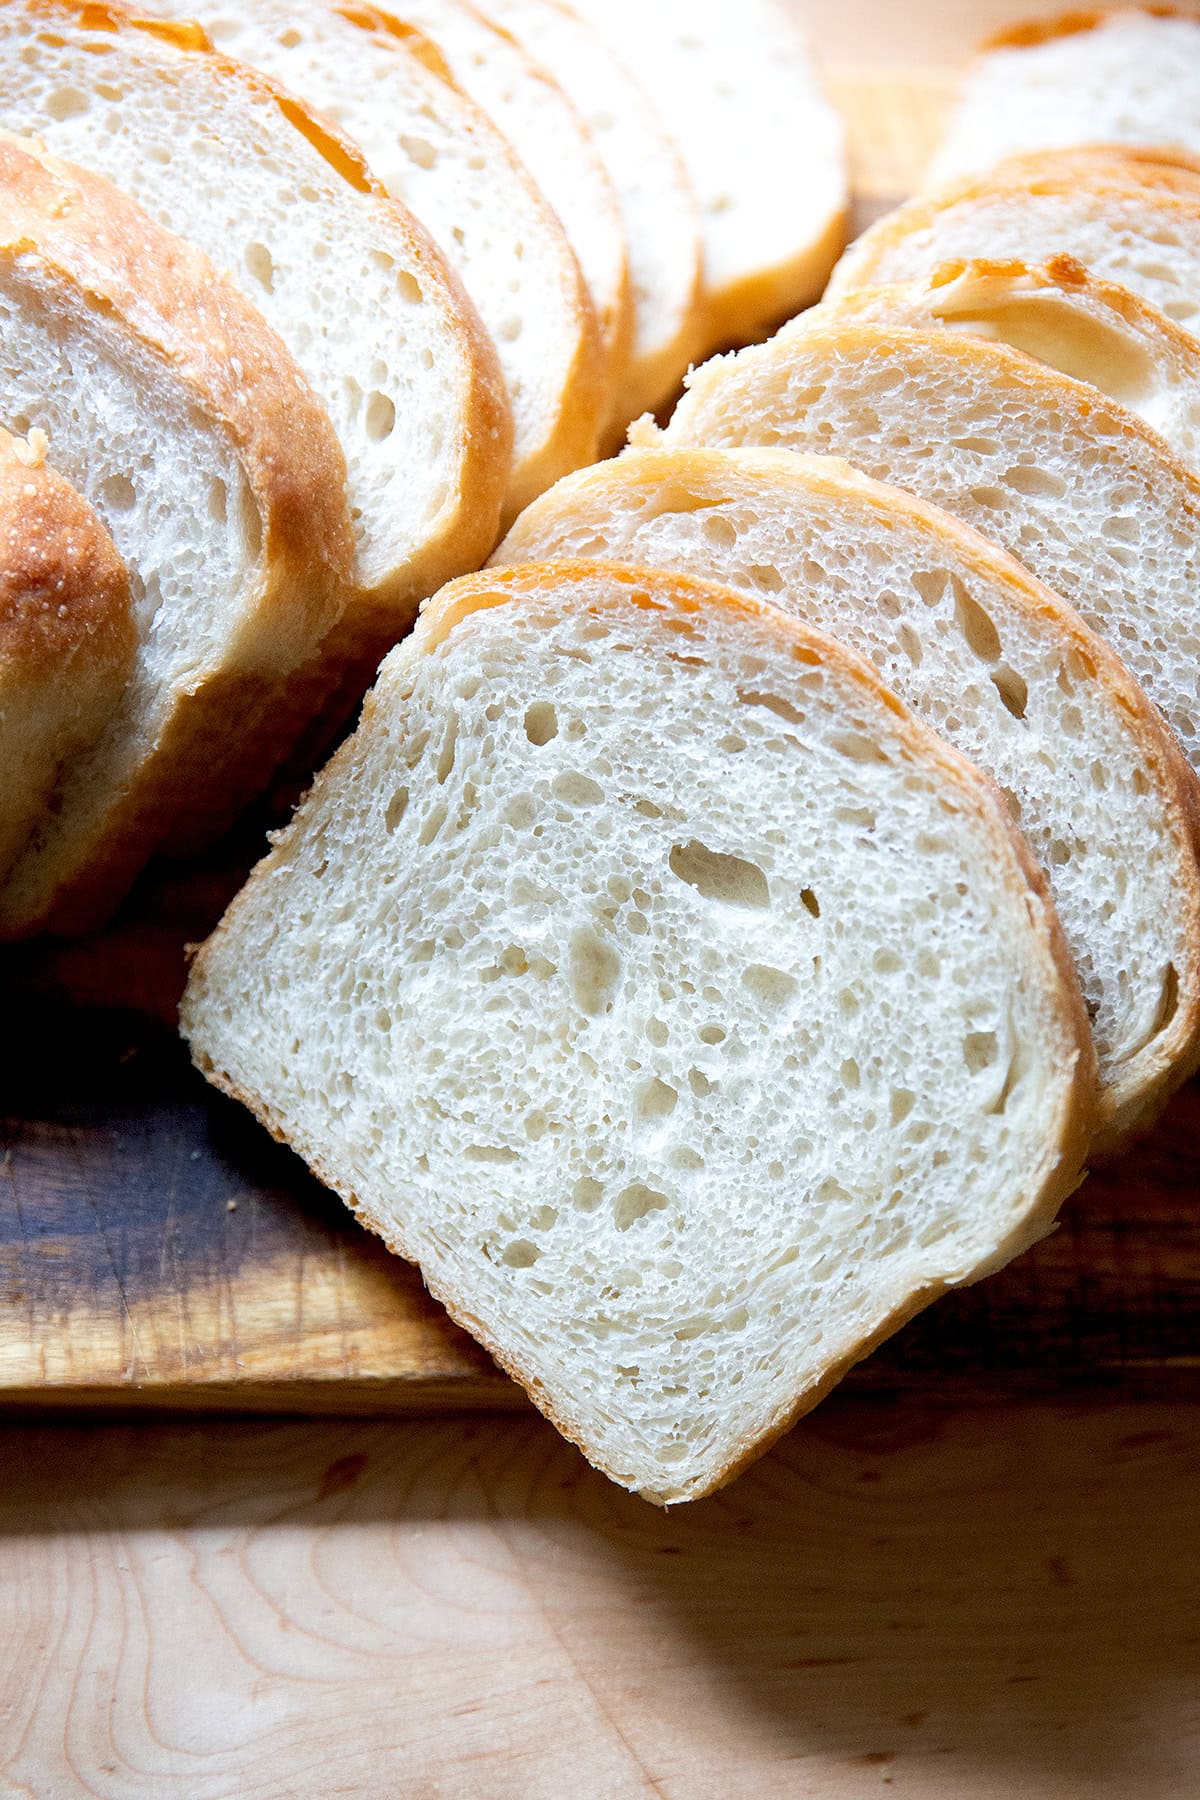
While there are numerous recipes for sourdough discard bread – from rustic Dutch oven loaves to automated bread machine versions – this specific recipe for a simple sourdough discard toasting bread shines in its simplicity and versatility. It’s intentionally designed to produce a soft yet sturdy loaf that holds up beautifully to slicing, toasting, and sandwich-making.
Unlike some enriched sandwich bread recipes that call for milk and melted butter for tenderness, this particular loaf relies solely on water for its liquid component. This keeps the ingredient list short and the process even simpler. An optional touch of honey (or another sweetener like maple syrup or molasses) plays multiple roles: it imparts a subtle sweetness that complements the sourdough tang, promotes beautiful golden-brown crust development during baking, and contributes to the bread’s lasting softness. If you prefer a truly savory loaf, the honey can be omitted without compromising the core structure.
This bread bridges the gap between a quick-bake loaf and a more involved sourdough project, offering a delicious middle ground. Its structure is robust enough to handle generous fillings without collapsing, yet tender enough to be delightful on its own, toasted with butter or jam.
Gathering Your Ingredients: The Essentials for Your Loaf
Part of the beauty of this simple sourdough discard toasting bread recipe is its reliance on staple pantry ingredients. Before you begin, ensure you have these components ready:
- All-Purpose Flour: The primary structural component. You can experiment with a blend of all-purpose and bread flour for a chewier crumb, or even a small percentage of whole wheat for added nuttiness.
- Water: The sole liquid, keeping the recipe straightforward. Ensure it's lukewarm to activate the yeast effectively.
- Salt: Essential for flavor, strengthening the gluten, and regulating yeast activity. Don't skip it!
- Sourdough Discard: The star ingredient! Use unfed, unfresh discard straight from your fridge. The recipe typically calls for around 200 grams, but adjustments can be made if you have more or less, by tweaking the flour/water slightly (though for best results, stick to the recommended amount or find a recipe specifically for less discard).
- Instant Yeast: This is key to a reliable rise in a shorter timeframe, as the discard itself isn't active enough to fully leaven the bread.
- Honey (Optional): As mentioned, this adds a touch of sweetness, aids browning, and promotes softness. A neutral-flavored honey is great, but feel free to substitute with maple syrup, agave, or a pinch of sugar if preferred, or omit entirely.
Step-by-Step Guide to Baking Your Perfect Discard Loaf
Now, let's dive into the hands-on process of creating your own delicious simple sourdough discard toasting bread. This method relies on simple techniques that build dough strength without intensive kneading.
The Initial Mix & Rest
- In a large mixing bowl, combine the lukewarm water, honey (if using), salt, and instant yeast. Stir well until the salt and honey are fully dissolved. This ensures even distribution and proper yeast activation.
- Add your sourdough discard to the bowl and stir until it's fully incorporated with the liquid mixture.
- Finally, add the flour. Using a sturdy spoon or a dough whisk, mix everything together until you have a shaggy, wet, and sticky dough ball. There’s no need to knead at this stage; just ensure all the flour is hydrated.
- Cover the bowl with plastic wrap or a damp tea towel and let it rest for 30 minutes. This short rest, often called an autolyse (or a partial autolyse since yeast and salt are present), allows the flour to fully hydrate, making the dough easier to work with and promoting gluten development naturally.
Developing the Dough with Stretch and Folds
Instead of traditional kneading, this recipe utilizes a series of stretch and folds, a gentler method that builds gluten strength effectively. A wet hand helps prevent sticking.
- After the 30-minute rest, lightly wet one hand. Reach into the bowl, grab a section of the dough from the edge, gently stretch it upwards, and then fold it over onto the center of the dough. Rotate the bowl a quarter turn and repeat this process 3-4 more times, working your way around the bowl. You'll notice the dough becoming smoother and more elastic with each fold.
- Cover the bowl again and let it rest for another 30 minutes. Repeat the stretch and fold sequence. Depending on your dough's strength, you might do 2-3 sets of these stretches and folds, with 30-minute rests in between. The goal is a dough that feels strong and can hold its shape better.
The First Rise: Watching Your Dough Grow
- Once your stretch and folds are complete, cover the bowl and let the dough rise in a warm spot until it has visibly doubled in volume. This could take anywhere from 1.5 to 3 hours, depending on the ambient temperature of your kitchen and the vigor of your yeast. You want to see a noticeable increase in size and a bubbly surface.
Shaping and Second Proofing
- Once doubled, gently deflate the dough using a flexible bowl scraper or a wet hand. You do this by pulling the edges of the dough from the sides of the bowl towards the center.
- Lightly flour your work surface and carefully turn the dough out. Gently pat it into a rectangular shape. Then, roll it tightly into a coil or log, ensuring there's good tension on the surface. This creates a well-structured loaf.
- Lightly drizzle the shaped loaf with olive oil and rub it gently to coat the surface. This helps create a lovely crust and prevents sticking.
- Carefully place the dough into a greased 9x5 inch loaf pan, seam-side down.
- Cover the loaf pan loosely with plastic wrap or a clean kitchen towel and let it rise again in a warm place for its second proof. This stage is complete when the dough has risen significantly and crowns the rim of the loaf pan, meaning it extends slightly above the top edge. This usually takes 45-90 minutes.
Baking to Golden Perfection
- Preheat your oven to 375ºF (190ºC) during the final stages of the second rise.
- Once the dough has crowned the rim, place the loaf pan into the preheated oven.
- Bake for approximately 45 minutes, or until the crust is a deep golden brown and the internal temperature reaches 200-210ºF (93-99ºC) if you have a thermometer.
- Immediately upon removing it from the oven, turn the loaf out onto a wire cooling rack.
Cooling and Enjoying
- This step is crucial for the bread's texture and structure. Let the loaf cool on the rack for at least 30 minutes, but ideally an hour or more, before attempting to slice it. Slicing too soon can result in a gummy texture.
- Once cooled, slice and enjoy your homemade simple sourdough discard toasting bread! It's fantastic for anything from avocado toast to grilled cheese sandwiches. For other versatile options, consider checking out Easy Sourdough Discard Bread: Your Go-To for Toast & Sandwiches.
Tips for Success and Variations
- Don't Rush the Rise: Temperature plays a big role. If your kitchen is cool, the rising times will be longer. A warm spot (like a slightly warm oven, or near a sunny window) will speed things up.
- Measuring Discard: The recipe calls for 200 grams of discard. If you have less, you can adjust by adding a tiny bit more flour and water to the dough to make up for the difference in volume and hydration, though sticking to the recipe's ratio is best for consistency.
- Crust Customization: For a softer crust, you can brush the baked loaf with melted butter as soon as it comes out of the oven. For a slightly crispier crust, ensure a good olive oil coating before the second rise.
- Freezing for Later: This bread freezes exceptionally well. Once completely cooled, slice the loaf and store the slices in an airtight freezer bag. They can be popped straight into the toaster from frozen. An entire loaf can also be wrapped tightly and frozen for up to 3 months.
- Add-ins: While this is a simple toasting bread, feel free to get creative! Incorporate dried herbs (rosemary, thyme), a handful of seeds (sunflower, pumpkin, sesame), or a sprinkle of nutritional yeast for an extra savory note during the initial mixing stage.
Creating your own homemade bread, especially one that uses up your sourdough discard so effectively, is incredibly rewarding. This simple sourdough discard toasting bread recipe delivers on its promise: a soft, sturdy, and flavorful loaf that will quickly become a household favorite for all your toasting and sandwich needs. Embrace the simplicity, enjoy the process, and savor the delicious results!
